How To Peen Pins In A Knife Handle?

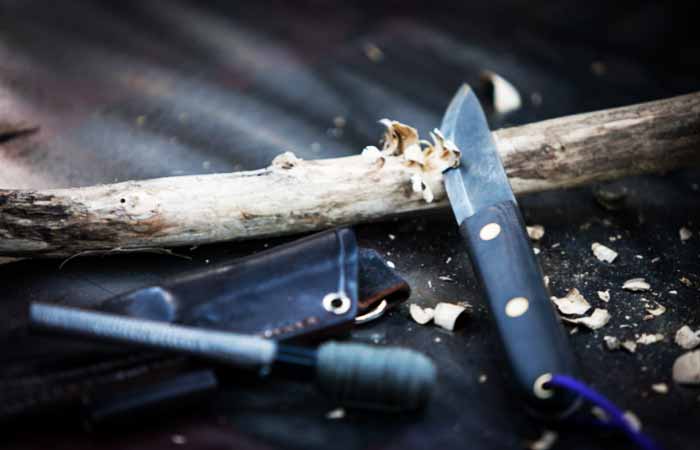
Knives are essential tools in our regular kitchen and outdoor activities, and it goes out of the job when their handles get displaced or broken.
On the contrary, a knife can last for years with a solid and sturdy handle, sometimes even for decades.
To increase their longevity and sturdiness, peening pins in the knife’s handle is a common practice.
This article is an attempt to enlighten you about how to peen pins in a knife handle through a step-by-step discussion about the whole process.
Stick to the end and read effectively in order to apply this yourself.
Why You Should Peen Pins In A Knife?
You probably had already known that pins are meant to enhance a knife’s longevity. That is the reason people go through all the troubles of peening pins.
A pin is forced into the handlebar and blade scale to create an almost unbreakable bond. As the objective here is to hold two pieces together, they can be made out of anything that is strong and rigid.
In most cases, they are made out of metals like silver, bronze, nickel or sometimes steel.
You also may use glue, epoxy or any same kind of material, but none of them is formidable enough like a pin.
So, to make the best out of your tiny investment and keep using your favorite knife- there is no way efficient enough comparable to pins. This sole reason should be enough to do the added chores if anyone wants their knife to last for decades.
If you are curious enough, then go through this link to learn how to make a knife handle.
Types Of Knife Handle Pins To Pin A Knife Handle
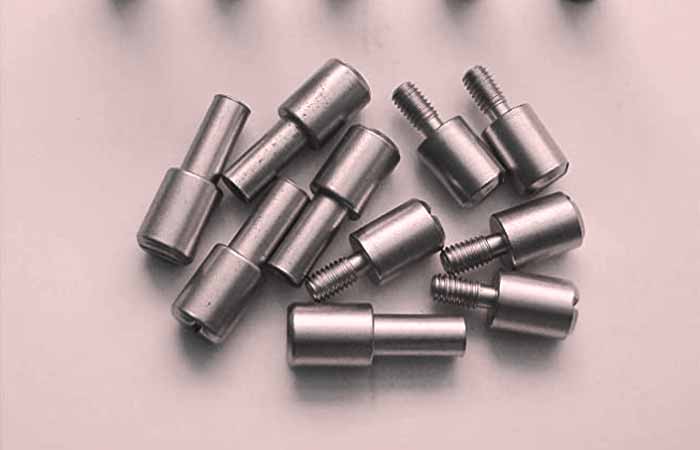
There are various types of pins out there that are used to pin in a knife handle. Each of them has its own privileges. Have a look at the brief discussion about each of those pins-
Stainless Steel Pins
Fundamentally, stainless steels are sturdy and rustproof. On top of that, the shiny look contrasts the whole scenario.
Bronze Pins
Bronze pins are famous among knife enthusiasts. It is strong, rust-proof and adds a rugged look to the knife.
Brass Pins
Brass are strong, sturdy and resistant to rust and water collision. These qualities make brass pins an ideal pick for a knife’s handle. They look great as a wooden knife handle pin.
Aluminum Pins
Aluminums are very malleable and gets oxidized very fast. In spite of all these, they make a good pin in a knife’s handle cause they are flexible and can look very good when polished.
Mosaic Pins
Mosaics are strong material to do the job as a handlebar pin, but their actual purpose in this job is to decorate the knife.
Micarta Pins
Micarta is not any metal, actually a piece of plastic made out of varieties fibers and other components. They are exceptionally strong and long-lasting.
These are the most commonly known materials, but plenty of other things are used to make a pin for a knife. To learn more about knife handle pins click here.
What To Use For Knife Handle Pins?
Except for the pin and the knife, you will need a bag full of materials to put them together. If you are going to do the rugged and interesting job, then you’ve got to collect all the materials first.
Follow the list below-
- A Strong Surface: While doing all these works, you will require a strong and plain surface, especially when peening.
- Epoxy or Glue: Epoxy or glue is used to hook the blade plate and the handle together, and then the pin makes the bond permanent.
- Tapered Reamer: This will involve a lot of drilling and making holes. A tapered reamer is a must need.
- Pin Punch: The pins go into the holes of the handle multiple times back and forth before making the position permanent. A pin punch will help to push them out.
- Ball-peen Hammer: You will need a tiny but strong hammer. Ball peen hammers will do a great job.
- Small Nylon Brush: This work will require a bit of cleaning; a small nylon brush would do just fine.
- Angle Grinder: The angle grinder will trim all the jagged surfaces and bring the shine look.
- Belt Sander: Belt sander will be required to polish out all the rough surfaces and give the pin and handle a smooth structure.
How To Peen Pins In A Knife Handle?
Peening pins in a knife handle is a step by step process and requires a lot of patience and precision.
Once you’ve gathered around all the materials needed, you can get started.
Epoxy or Glue
The main function of the knife is to cut through something. The force is put upon the knife’s handle, and the blade goes to make the precise fish fillet.
To accomplish this whole relationship, the first step is to assemble them together.
Some prefer glue as the best solution for fitting a knife handle, as it strongly holds the handle in position in time when hammering pins may dislocate the handle.
Use whatever you like and put it between the handlebar and blade plate, and let it dry and make a strong bond.
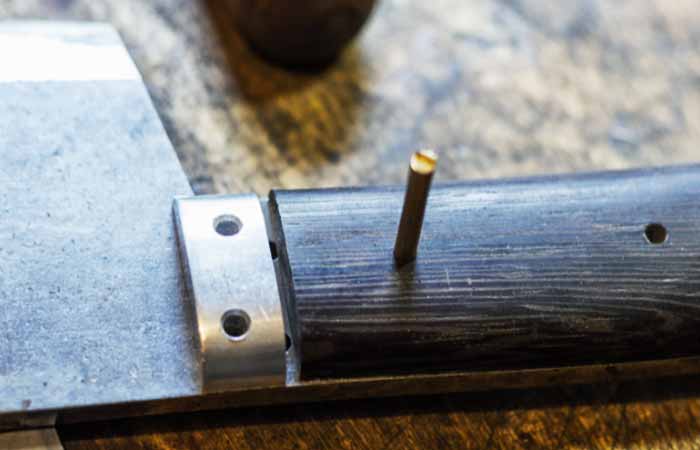
Make A Hole
The next step is to make way for the pin thruway, the recently assembled handle, and the blade plate. This is the way to peen pins, so be very careful digging the hole.
If it gets somehow a little oblique, that’s going to ruin the handle.
- Take the tapered reamer and make a see through hole, according to the size of the pin.
- Using a drill may sound convenient and easy but going that way has a good possibility of cracking handles.
- Use the nylon brush to clean the area during this process, as the small particles may get stuck inside, which will later cause trouble when settling the pin.
- The drilling may leave the handle a bit rougher and jab but don’t worry. This part will be taken care of later.
Trim The pin
Pins don’t come according to the exact length, so the extra part has to be trimmed down.
- Take a piece of pin stock, keep the essential part, and cut the excess portion.
- Be patient and firm, do the task in technical ways.
- Usage of force or pressure will bend the pin, and eventually, it won’t be of any use.
- Take the measurement first, and better keep it a bit longer than the actual length. It will give you more space to work.
- It also can be done after peening, but it is easier to do a prior.
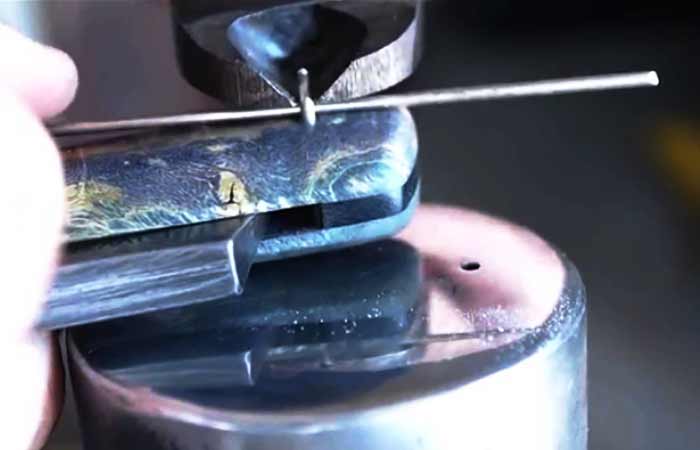
Peen The Pin
The final step has arrived, which is to ultimately peen the pin into the handle.
- Take the pin you’ve shaped just before stepping into this process, the ball pin hammer, and put the glued knife into the solid surface.
- Now, put the pin the handle holes gently and use the ball side of the hammer to peen it down.
- Peen one end at once and do not put too much pressure while doing so, rather make gentle blows repetitively.
- The pin is supposed to go through the hole and be a bit extra in length on both sides of the hole.
- This way, while you hammer them, they will mushroom and strengthen the bond.
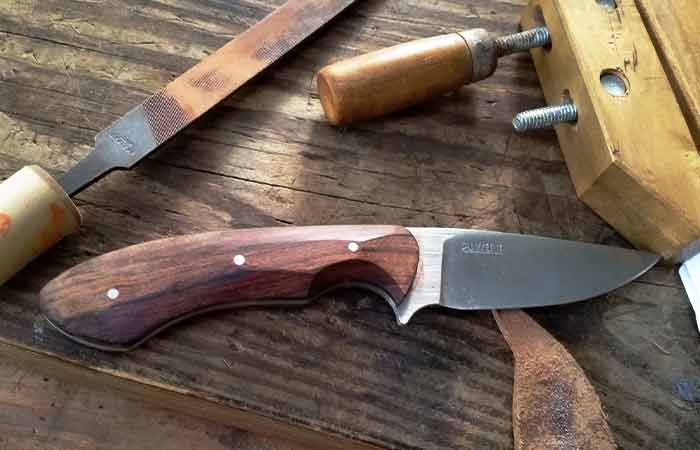
Polish
You probably are accustomed to seeing a very polished handle of a kitchen knife, but that doesn’t happen all by itself.
- After finishing peening, the knife will look very rustic and incondite. You have to polish it and make it look as you’ve imagined it would be.
- Pick up the angle grinder and finish the uneven ends. Be patient, this may take a while.
- Now blow the final stroke, take out the sandpapers and bring out the shiny, sleek look polishing the handle.
Now it looks like what you’ve thought of it, right!
Tips And Tricks To Peen Pins In A Knife Handle
Peening knives handle may be your hobby or profession, nevertheless- there’s no end to learning. We’ve discussed the whole process very comprehensively.
Here we have brought a few more extra tips and tricks for you-
Handle
Choose the handle keeping the type of blade in mind. Not wood or mosaic handles look good on all types of blades. It has to create a good contrast.
Also, check if the handle material is ready to go under all the heavy beating and hammering. A weak handle will just be cracked meanwhile working.
Pin
The pin will be beaten to take a lateral shape, so it is important for it is to be resilient.
For example, stainless steel is very hardy but very tough to form, whilst Aluminum and Brass are easier to work with.
Hammer
When hammering the pin, do it very gently cause putting too much pressure or overdoing will just end up cracking the handle or bending the pin.
Measurement
A good measurement of the handle’s width and hole’s diameter makes the job a lot easier.
Final Words
Knives have been friends with humans from ancient times, starting from the hunting fields to the field of battle. It carries a heritage in itself. It is history in an art form.
A profoundly peened pin keeps the knife working correctly for years, and persistently learned skills keep growing steadily towards perfection.
You might not get the desired outcome at the very first attempt, but don’t let the failure spoil your exuberance.
Profession or passion, keep producing good works—best of luck.